Bouncing ball
1.
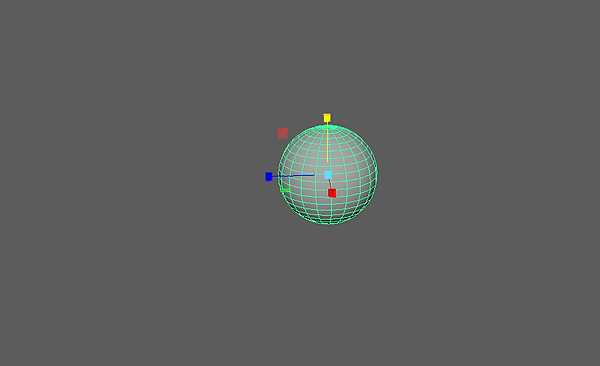
I created a sphere which is what I will use as a ball.
2.

Using the timeline I placed keyframes by changing the position and placing the object in different places and then pressing "S" on the keyboard. This created a keyframe which meant when played the ball ends up in a different position.
3.

I went to the window tab and selected "Animation Editors" Then "Graph Editors" which opened up the graph
5

4.
The attributes editor allows me to change the attributes of the object.

Using the graph I was able to sharpen the bounces which made smooth bounces. The graph allows easy editing within the keyframes.
6
This is the end product for my bouncing.
This is the video i used as reference
Animating a rig
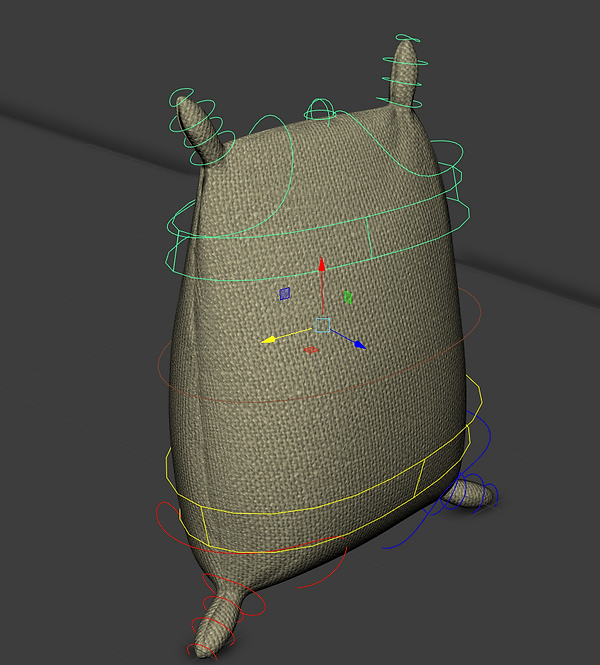
Using a flour bag I moved the different sections of the rig.

The top part of the rig allows me to control the top part of the rig.

It also allows me to squash the rig and it changes the appearance all of the rest of the flour bag.

It also allows me to stretch the flour bag.

The rig allows me to manipulate the whole body of the rig.

I added in keyframes to the timeline
This is my final playblact
Animating a hand

I created a hand and arm. I created them with simple cubes which i then parented together.

I then froze transformation. This puts all the points to 0. Meaning it will move correctly when animated.

I changed the pivot point. this allowed me to rotate the different parts of the hand but have them rotate by the edge of the object.

I parented all the blocks to each other and then went to Windows>General Editor>Hypergraph:Hierarchy to check the parent/child links. This brought up a table in which the blocks are parented.
This animation took along time to complete as to create a realistic movement i had to move each bit individually.
To allow the hand to pick up the ball i placed down two different balls which change the scale using a key frames. The first ball is not parented but when the hand reaches the ball it disappears and is replaced with a new ball which is parented to the hand which allows it to move with it.
IK Animation

This is a Inverse Kenetic rig. When you move the hand the rest of the arm will follow this allows it to keep its shape when animated.
Here is an example of how the Inverse rig works
This is a basic animation I made using the Inverse rig
Leg Rig

I created my own leg rig and animated it. I started by creating the legs which where made of simple cuboids. I then went to: Shading > X-Ray.


I went to the rigging shelf and selected the joint tool. I applied this in the side view otherwise it lays it on the floor.


I selected the IK handle tool. I draw the line from the toe to the heel ball join. I used Q to exit the tool.

I selected the NURBS Primitives >Circle. I scaled the circle over the foot so it filled the whole foot. I then pressed D to enter pivot mode and placed the privet at the heel, Knee and hip.


I created a cube and parented it using the short cut "P" to the top joint of the leg.


I then parented all the skeleton to the cubes so they moved together.
This is the animation i created with the rig i made. In the animation the rig walks and then gets hit by a hammer. I did this as a walk cycle is an easy way to make an animation and make use of the rig. I liked the way the animation moved when it flew through the air which is why i added the hammer.
Posing with the eleven rig

This is the eleven rig

This is the Rig i downloaded called Eleven.

Using a rig named "Eleven" I used her limbs and to pose into positions. The one above is in a balley dance pose.

In this pose i made her do a dab.

I then realised that the rig's face can be moved and was able to change her facial expressions. After knowing this I gave her a worried expression.

I then attempting to make a walking posture which ended up having a rather weird looking face.

I then wanted to work with her knees and see how to move them so i made her do a sitting down pose.

I then wanted to make a creative scene where i created very simple Lightsabers and added them to the scene. I added some lighting to the scene with area lights. After i rendered it with Arnold render.

The original render looked like this, very dull and dark.

I then added colour to the sabers and the scene looked a lot better. I gave the character very aggressive facial expressions.

I Then rendered a shot from the other side to show the facial expression of the other character
Face turn

Next I used the facel rig and key frames to make the rig turns it's head.

In this image it shows the camera that i added to the scene. The timeline which is on the bottom of the screen.

I added lighting to the scene and then rendered it.
Here is my final animation.
Walk Cycle and bouncing ball.
A walk cycle is a very basic piece of animation but can be very difficult.

The image above shows a diagram of of a walk cycle. This is a good image to follow to create a walk cycle.

The image above is a good reference image to follow on Maya. This is because it is showing the positions the model should be in in the different time frames.

I started by placing my Rig with on leg forward and one back, with the corresponding arm moving in the same direction.

I brought the left foot up and rotated a little bit. I made sure the knee was bent, each arm has also been moved with the leg.

I brought the left foot all the way forward and placed it flat on the floor. I moved the arm all the way forward and the corresponding arm all the way back.

I then repeated this over again until my rig had moved forward alot of times.


I have explained the primary movement but now i have the secondary movements. the first one is the hips. when someone walks there hips move with them, creating an S shape.


When a person walks there shoulders move as well so as the arms move the shoulders rotate in the same direction.

I moved the arm backwards to anticipate the move of the arm.


I then moved the arm forward and closed the hand over the ball.

I used this circle on the wrist to move the arm around to where i wanted so i can set the key frame.


Each of these balls are different balls this is because the second one is parented to the hand meaning it moves with it. The 1st and 3rd ball are not parented. Each ball is there through the scene however the visibility is of and then turned on with a key.

I then bounce the ball using key frames. using the graph editor is the best way to try and get a good bounce.

The ball bounces on the floor.

The grpah shows the bath of the bounces
Here is the bouncing ball video this was one of my test ones
This is my final animation of the the bouncing ball.

I was going to render out the sequence as a video but the render keeps on messing up. if you look at the characters eyes they look very messed up. This is why i didn't render the clip out.
Character weightlifting

I began by creating a bar for my character to lift.

I then keyframes my character to bend down and pick up the bar. I did this using all the skills I have already learnt.

My character then grabbed the bar.

I adjusted the grip of the hand by adjusting the properties by Open Close.

To make the arms move with the bar I had to create an locater within the create tab.

I placed the locater on each hand.

I selected the Constraint menu and then clicked on the parent.

The bar now follows the hands.

Using the main body rigid area I straightened out the rigs body to complete the first motion of the deadlift.

Using the same area of the rig i then bent down the knees to allow the character to bring the weight up to it chest.

Selecting the bar i moved the bar up which also brought the hands and arm up with it because they are parented together.

To complete the movement i animated the hands to move directly over the rigs head.

I then got the rig to drop the weight at the end of the sequence.

I clicked on the circle part that controls the hand.


To make the rig unattached from the barbell i switched the blend parent 1 from 1 to 0 this means the hands will not follow the barbell.

Using the graph editor I was able to change how the barbell fell and make it fall smother and much more realistic.
Here is the final render of my deadlift.
11 second animation
I created a eleven second animation that was synced to an audio clip.
Here is the Audio clip i used for the animation
Models
I had to create the set myself and all the assets in the scene.
Tardis
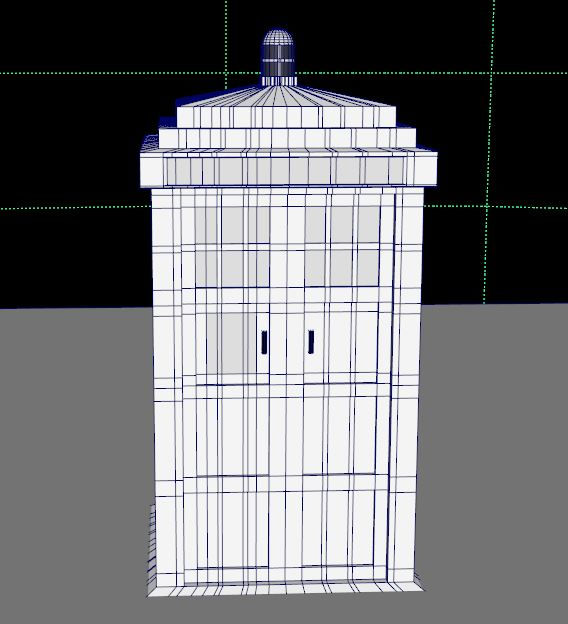
The Tardis was very simple to make, due to its square shape. I added many edge loops to a cube to separate the cube into different sections.

Using the areas i separated with the edge loops i was able to easily select the areas that i wanted. I then selected the faces and extruded them inwards to create windows or the door panels.

The top of the tardis was made the same way as the windows. except i extruded them up. The top light of the tardis is made of two separate shapes. A circle that i cut in half and a cylinder.

I separated these two areas in the model from the main object as i am going to add images to them.

This is the UV for the tardis. I used the Automatic mechanic and didn't touch any of the UV due to it being very complicated and it worked this way.

The windows where a separate material to the rest of the model.

I created the textures within Substance painter and applied them within Maya. I am unable to show the work within substance painter as the file went curupt,
Street.

The street scene is very complicated and is made up of many different models.This house is made up of a lot of different shapes and models itself.


As you can see from the images the house is made up of a lot of different shapes and models.

The street is made up of three different elongated cubes. two being the path and the other being the road. The lampposts in this scene are made of a two cylinders.
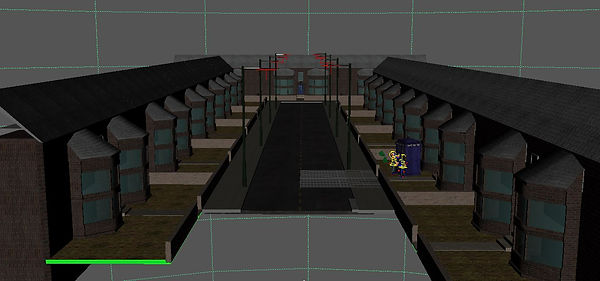
Here is the same scene when it is finished and completed

Here is a few textures that i used within the scene. These textures i got from texture websites. This was because it was easier to get a really good texture then make it myself. This one is the pathway alongside the road.

This texture is the one that I used on the path leading up to the house.

Here is the brick that i used to texture the walls.

Some models that could not have a simple texture put on them like a wall needed to have a personal texture made for them. One of these models was the lamppost. The lamppost is not very obvious in the scene but it was alittle bit od detail i wanted to add.

This is the lamppost within the scene.

The road is also an important part to the scene. However, it is again a part that will be easily missed. I got the texture from online aswell.

This is the texture i used for the road.
Hammer

I also created a hammer for my scene, i made a hammer so my character had something to interact with. I separated it into three different sections. These sections are the handle, top iron bit of the hammer right and then left. I created it by copying the an image.
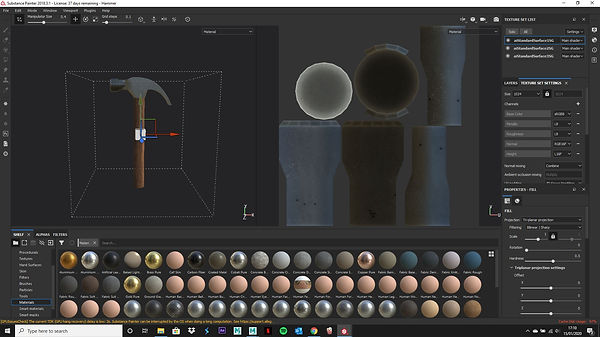
I created the texture within substance painter and it came out very well. I used the materials that where already on substance painter.

This is the hammer within maya will all the textures applied.
The animation
I began by animating the actions of the male character.

This is the starting position of the animation

This first part is a very simple animation of the character moving his hand backwards and forwards as if he is using the hammer. Using the hand and the elbow i was able to accomplish this.

I continued the first action but added in the movement of the head. The head is animated with the yellow loop going round the head.

One of the hardest parts of this animation was turning the character round to face the other character. I turned the hips around as well to turn the character around.
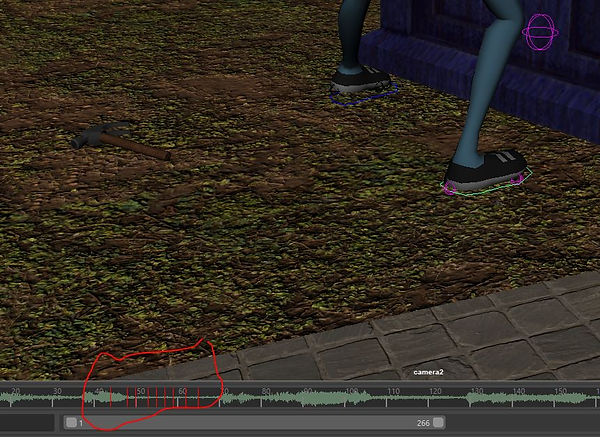
It was so difficult because i had to use multiple keyframes in a short notice to turn the character around. It was difficult to keep the keyframes smooth and looking natural.

Once the character was turned around it was not so bad. Due to the fact my characters arms to swing about to anticipate and go along with the characters noise.

The two red circles are the most important rigs that i used as the one on the right controls where the hand and arm goes and the one on the right controls where the elbow goes. Moving both of these together creates a natural movement.

This is where the more movements come into play. The chest curves in and out to create an inhaling and exhaling movements. I also dropped the hammer. I did this to add gravity to the animation.

The chest rig has not got that many keys set through out the animation. this is because the chest is a secondary movement.

I then moved the characters arms down to create a chance for him to move back to the tardis

The character then moves back to the tardis. I did the by reversing what i did before.

The female character has simplistic movements with just her arms, head, chest and waist.

From this image the character only moves her hand and head.

Each part of the rig has its own movement. These ones have the translate, rotate and stretch. other parts have different sections.

To make my character looked shocked the had to raise her arms and move the elbows below her hands. Her hands then slowly moved back and forwards.

She then crosses her hands and shakes her head. all of these actions are using the same tools as the other character.

The character then moves her head up to her head and shakes her head.


All these areas around the mouth where used to animate the movement of speech.

Using the timeline and the noise shown on the graph i was able to match the mouth easily.
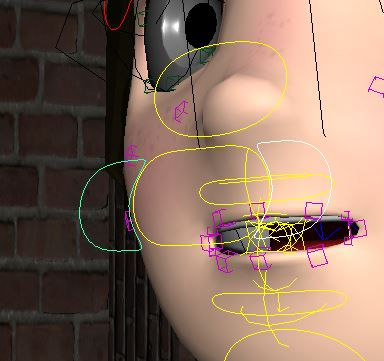
Using these semi circles selected in the image. These allowed me to close up the mouth to match certain words. For example ones that start with "W".

Sometimes i had to to move out the lips to gain help lip sink a "w"

This is the hammer that i added into the scene as a tool for the character to use. I wanted to dd this do bring another aspect to the animation. As i did not want it to be just be movements from the characters.

Th hammer follows the hand as it is parented to the hand. I did this by selecting the rig connected to the hand and then i selected the hammer. After this i pressed P and this connects the hammer to the hand. When the hammer leaves the hand it is actually a different hammer. This is because the hammer will only follow the hand and i need a fresh hammer with no settings.


This is how i did it. The two hammers are always present in the scene but the visibility is turned off when the hammer is not needed. This is then keyframed.

The hammer then leaves the hand and is then moved around with keyframes.

The hammer is moved by keyframes. The keyframes can be seen in the bottom of the screen. i mainly wanted to add the hammer to add an aspect of gravity to the scene.


The camera Is keyframed to move around the scene. I originally had separate cameras and was going to individually render all t I then he camera but i realised how ridiculous that was. so i keyframed one camera.
This is the final animation. I was not able to render it as it took to long. However I am going to render it at some point.
My thoughts
I was surprised that i enjoyed this work, i thought it was going to be stressful and i wasn't sure if i could get the hang of animation. This was because i struggled using maya to control the characters and to create smooth and realistic movements. Although i had these difficulties i felt i did well to create an animation the expresses the emotions that i wanted it to. The animation is smooth and i was impressed with the end result.
I did however find it really difficult to animate my character turning around. I had great difficulties trying to create a smooth animation with this. So there is certainly areas i can improve. Overall i do need to learn and practice with my animation work, but i am certainly improving considering this is my third animation i have mad.