Unity

Here I am learning the very early and simple tools on unity. These tools where creating shapes and changing there size, also adding in lighting and changing the colour of that.
Creating a building scene.

Here I got a building model that was already created for me and imported it in to Unity. I changed the colour of the building using bright colours. I also added in spot lights to act as street lamps.

I really enjoyed this part as I added fog into the scene which made the scene look really nice, Especially with the spot light creating a spooky look. The lighting is also dark which is done by rotating the light.
Creating Torrain

Creating torrain is one of best parts of unity, it is really simple and fun. I was simple just messing around with the settings, creating different landscapes such as the cliffs. I also dded in trees and water. Using the paint tools I added in textures for the sand and cliffs.

I added in a first person control. This is done with the settings I downloaded from the asset store. Also with the set store I added in affects life rain, fire and explosions. Adding in affects like this was really easy as the asset store already had them there to download and place into the scene.
Rubics Cube

In this task I created a ruby cube. I did the to learn how to import objects and add materials to an object. I began by exporting the rubies cube. Once I had the rub cube in the project window I grabbed and dropped it into the scene. I than applied the martial by creating a material and then dropping the texture onto the Albido tab.


I dragged and dropped the object from the hierarchy tab and dropped it into the project tab this then created a prefab. allowing me to drop the same object back in. The same results canals be produced with Duplicate. Setting the coordinates in the inspector tab was able to line up all the small cubes to create one large rubies cube. I then created a prefab with the large rubic cube.
Procedural Skybox
Procidural skybox is possibly the smiliest of all the skyboxes. It allows you to change the colour of the sky and the ground. Not much can be done with this one.
Panoramic Skybox
This skybox is more certainly one of the best skyboxes and it allows complete 360 view. This provides a realistic view.
6 Sided Skybox
This skybox is very similar to the Panoramic skybox in which is it like a 360 image around the scene, however it is complete with multiple images which make it look a lot more life like. However it needs 6 images to be complete.
Skybox


Materials

First of all I need to import the bunny into the scene. Once a did this I created a material and then selected the albedo and then placed the material onto the bunny.
Glass
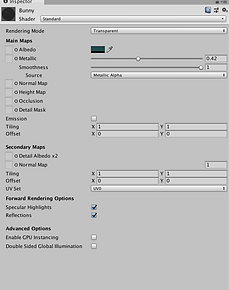
I then created a transparent bunny. This was good and affective as it allows to Crete objects that would potentially be glass. I did this by selecting the colour and then changing the alpha channel.
Chocolate


I created a chocolate bunny by changing the colour to brown and sliding all the properties of Metallic and smoothness to 0
I created multiple materials such as a golden metalic.
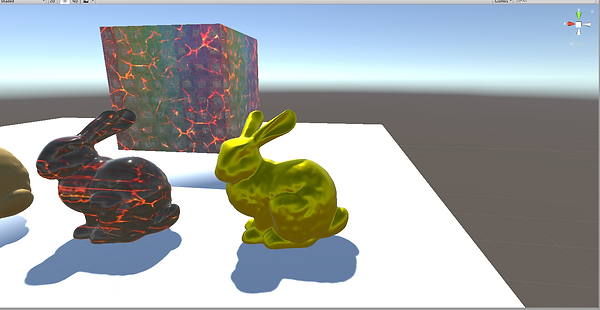

I than created a cube in which I placed a normal and a bump map onto which gave it a 3D look. I did this by

I added a displacement map onto the cube aswell. this did the same thing as the previous map however it made the image look displaced and waves. making it seem the object was more complicated then it actually is.

I than began to mess around with the cube. changing the texture of it to that of the lava one. I added the lava texture as an albeno which put it behind the old texture.
Particles - Fire

This is the basic particle set that unity gives you. I changed the colour of it by going into the colour section and changing it to yellow.
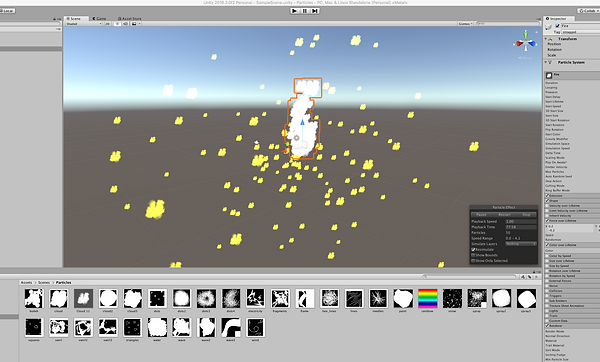
I changed the material for the particles I did this by creating a material and adding the texture to it. I added it by going to the albedo section of the object and placing it on.

To create the fire there is a lot of settings that need to be changed. These settings are changing the duration to 5. The start life time to 5 swell. the start speed needs to be 0. Then the start size needs to be 1 and 3. In the renderer tab I connected my cloud material to the material setting. I also changed the renderer mode to billboard. Going to the colour tab to white yellow red then white.


Snow

To create snow it is a lot more simpler then the fire.
To create the snow I needed to create a particle and renamed it Snow. I created a new material using snow.png. This allowed the particle to actually look like snow. Next I selected the box shape for emissions. I also changed the size of the particles to 10. Next I changed the start speed to 0, and gravity modifier to 0.9. Creating snow is a lot easier than creating the fire as it does not take much editing to complete it.


Trail
This is by far the easiest out of all the particles. As the game already has it there. You just need to change the colour to what you want. The first step is to add the trail renderer component. If I play the game and move the object it will leave a trail. Then I went to element 0. I added in a rainbow texture. This then changed the trail to a rainbow colour.

Step 1
Particle bunny
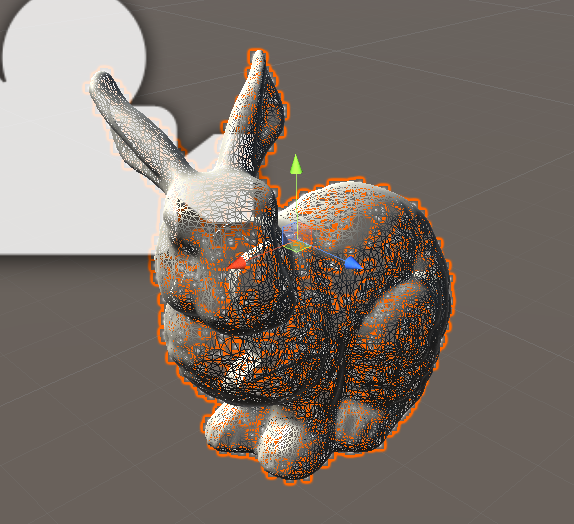
Step one I needed to change the scale of the bunny to 0.1 and then spawn Ito the scene. I then spawned in a particle system and changed the shape into a mesh.
Step 2
In the mesh box I added the bunny

Step 3
I changed the start sped to 0 and the start speed to 0.1. I also went to the emission tab and changed the rate over time to 500.
Step 4
I can now see particles in my project when I press play.

Introduction to Scripting

I created a cube and a script in unity. I than opened the script by double clicking on it.

I then created the script to come up on the controller bar and I proceeded to script it to say a lot of messages such as "Hello World!" and got it to say my name.
Procedural art
Using unity and scripting I created a piece of art within a 2d game on unity and a script.
I started of by writing on line 10 "transform.Rotate(0, 0, 45);"

This script would than turn the cube by 45 degrees once I had started the game.
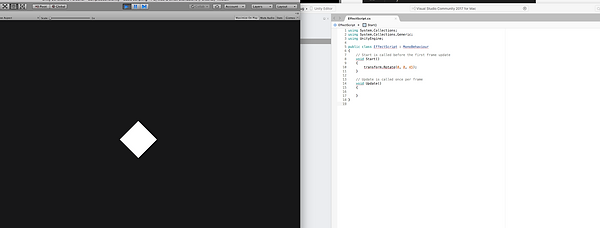
I than duplicated the cubes to end up with a pattern.

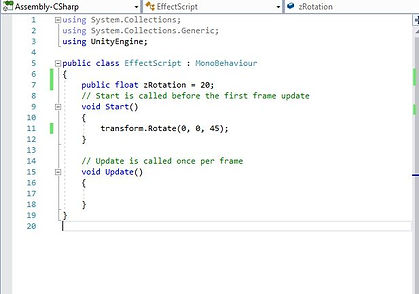
With this script all the cubes rotated by 20 degrees and ecause it was public I was able to edit it on Unity

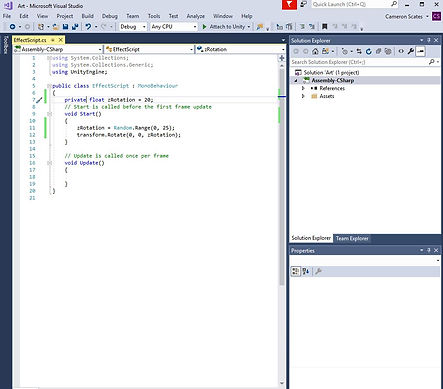
I set the script to randomise the script. this meant that all the squares turned in a random motion.


I edited the script to add the minRotation and maxRotation this randomly rotates the squares to random points


This randomly rotates the squares to values between 30 and 60


I changed the script to change the properties of the cubes
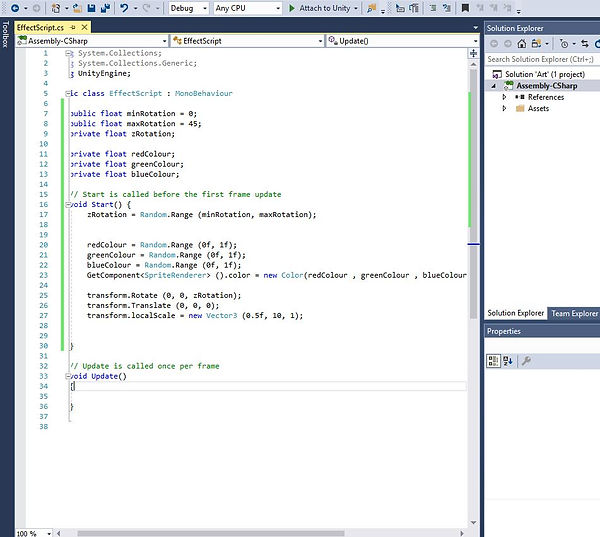

I wrote a script which rotates the cube that I placed into the scene. I rotates it randomly to any property between 0 - 90 degrees.


I duplicated the cubes to make a grid of cubs when I played the scene and all the cubes rotated separately.

I changed the texture to this pipe texture and when played created a series of pathways.

I added this script to the pipeline and it repeatedly updated the movement which looks like crazy glitch.

This script made the pipes turn slower.

Random Size

I imported a circle and duplicated it to make a grid of circles I also add a script.


The script I created changed the size of the circles within he scene.

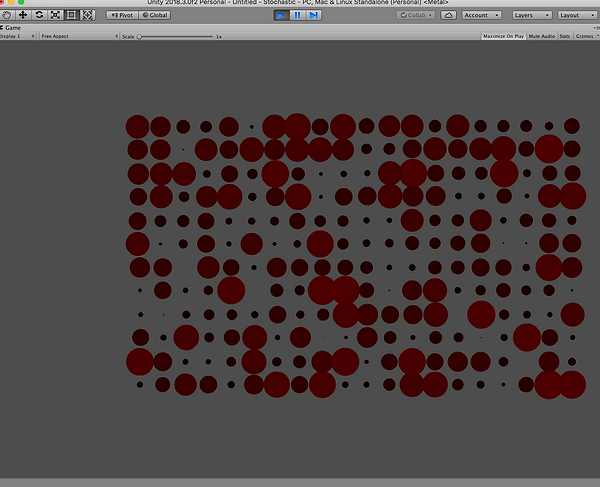
I added this script to it which changed he colour an the size of the objects.


Procedural Art


I placed a cube into the scene and duplicated it. I added this script to the cubes which allowed them to move upward in a stair motion.


I added "/5" to the script just behind the "Xpos" this made the vehicle movement slightly less than the previous picture.


Added "xPos = Mathf.Cos(transform.position.X);" to the scene which created oscillation.


I edited the script to make it rotate the squares instead of just moving them up and down.

I changed the Sprite to a different object and ended up with this.


I changed the script to rotate the object a little bit more.

This script allows the object to rotate in the scene. and change colour
Underwater world
This was a test that I had to complete where I had to create a underwater scene using the tools within unity.

I started off by editing the lighting to make it look like an underwater scene. by adding in blue fog this gave everything a blue tint which gave an underwater feeling.

These are the fog settings I applied to my scene.
Materials
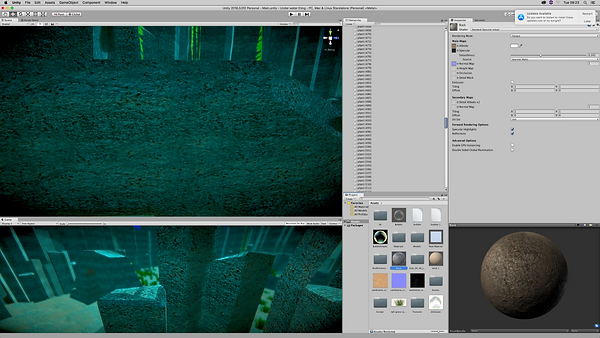
This is my rock material that I have applied all the rocks within my scene. It looks great and applied a realistic scene

This is my sand texture which like the rock texture looks great as it has a normal map on it which makes it look 3D

This is my grass texture which again looks great, I got the image online which I then applied to the grass giving it a realistic view.
Models

All of the models I was provided with I just rearranged them and changed there size to create a realistic looking scene.

I created an include area to allow me a smaller area to work with. This would in turn create a more Realistic scene with all the assets so close together.
Particles.

I created a bubble particle system. This gave the feel of underwater as underwater there are bubbles.

These are the setting I have applied to the bubbles.

I applied the bubble particle to the rotor which applied an effect that bubble where coming out the back of the submarine.
Post Processing
Before

After

I'm a paragraph. Click here to add your own text and edit me. It's easy.
Final Outcome
Sorting

I created a game title within unity.

I did this by placing all these assets into the scene. Which lucky for me was already in the correct proportion so all I had to do was size it to fit the image.

To layer all the images I had to change the number on the "Order of layer" The higher the number the further uptake image will be. for example 0 will be right at the back where as 10 will be at the front.
Y axis Sorting
I placed in the bush prefab which I had already been given and layered it so they where slightly overlapping.

I went onto Edit/Project settings and Graphics and change the y axis to 1.


I added the bee to the scene which already had a scripted.
The bee should edge through the bushes and should look like a layer.
I went into the sprite editor and the little circle which is the pivot point this changes where the bee goes through the bush

Masking

I added the sprite mask to the scene and applied the bee as the sprite. I also turned of the sprite renderer.

I change the setting of Mask Interaction to Visible Outside Mask. I did this on all the bushes.
This is the end result.
Rendering

I changed the "Clear flags" to don't clear
This is what happens when I ran the game and moved the camera.

I duplicated the camera which would turn the three cubes into 6 in the game view.

I change the camera properties of the viewport rect to X 0 and W 0.5 for the first camera and X 0.5 and W ).5 for the second.

This created a split screen look.
Shader graph

I added a bunny asset to my scene and created a matiral and a shader I opened up the shader and right clicked and added a colour node.

I selected the matirial a clicked on the shader tab at the top and added the shader under the shader tab. This I also went onto the shader editor and right clicked and selected convert to property. this allowed me to change the colour of the material from the main menu instead of going into the shader editor.

I clicked onto the settings icon at the top right and I changed the surface option to transparent.

I right clicked and selected the node and added a slider and attached it to the alpha this allowed me to change the values of the transparencies.

I again selected convert to property which allowed to select the transparency in the main editor.
I created a split.


I connected the split to the colour property and the plan channel. This allowed me to changed the transparency in the colour tab.

This I what my bunny looked like once was finished.

I imported the bunny and corrected the size.

I created a new material and called it "My Mat".

I created a new shader and went into the edit menu

I right clicked and created a node. and selected the colour one.

I attached the colour node to the unit and changed the colour to red.

I applied the shader to the material.

I created a second shader and made it blue.
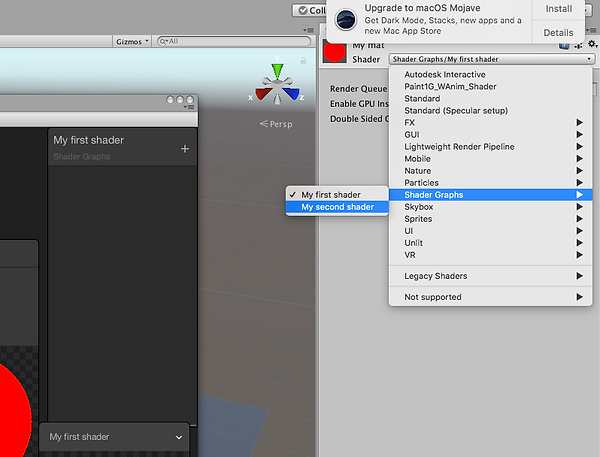
I also applied this shader to the material.

This is what the bunny looked like at the end it reacted to light swell as having good colour.
Making Grass

I imported the basic shape that will later become grass.

I created a shader and went into the edit menu I added 2 nodes Sample texture and 2D texture asset.

I connected all the points up

I converted these nodes to a property which allows me to edit it in the main game editor menu.

This is what the image should look like in the editor.

I joined the A(1) to the Alpha channel.

I changed the surface to transparent and ticked the box for two sided.

I added a colour node and converted it to property.

This is how the editor looked once i was finished.

This is how the grass ended up looking and it swayed
Changing colors

I imported a bunny model and created a material and a shader i then proceed to edit it to look like it does above. i added in two color nodes and made them property and naming them Color 1 and color 2. I added a add node and connected the color nodes to it and connected the add node to the albedo part of the Master node.

This is how the bunny looks within the scene

Because i made the color nodes property i was able to edit the color in the menu.


With colour two being a darker or lighter colour it is able to change the colur overall. like mixing paints.

I change the Add to a Lerp and added a slider and created it in property which i than linked to the T(4) of the Lerp.
I'm a paragraph. Click here to add your own text and edit me. It's easy.

The transition ends up in the main editor scene

I then deleted the slider and added in the a spliter and a rotation node i attached the Rotation node to the split and attached the second attachment to the last one on the lerp node.


This is what the new nodes do to the material it changes the colour as the object is moved on it y axis
Phong Shader


This shader focuses mainly on light nd colouring.
Toon shader


This is what the toon shader looked like within the menu
Fresnel Shader

Fog Shader


This shader gets darker the further away the camera is
Vertex Position

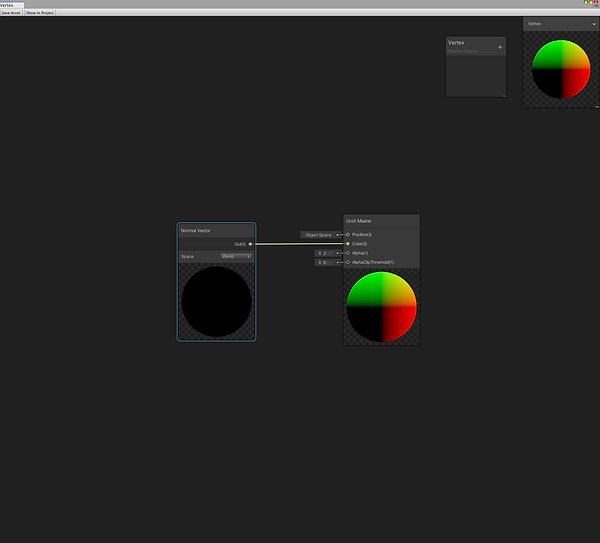
This created a multicoloured shader
Vertex Displacement Shader


Scripting
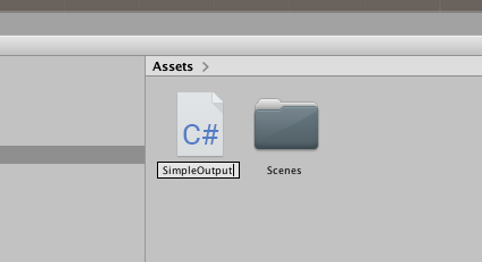
I created a new script called SimpleOutput

I created a script which showed on the console tab the name which I listed on the script.
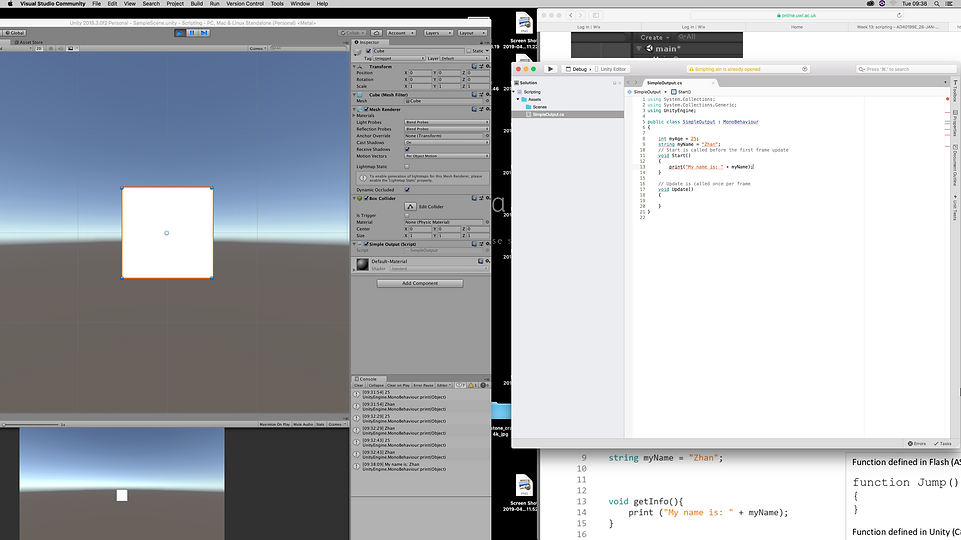
I created a script which in the console tab showed "My name is: Zhan"


This script constantly multiplies 2 by 2.

This script shows the 10 times in order.

In this one I added 4 to to 2016.
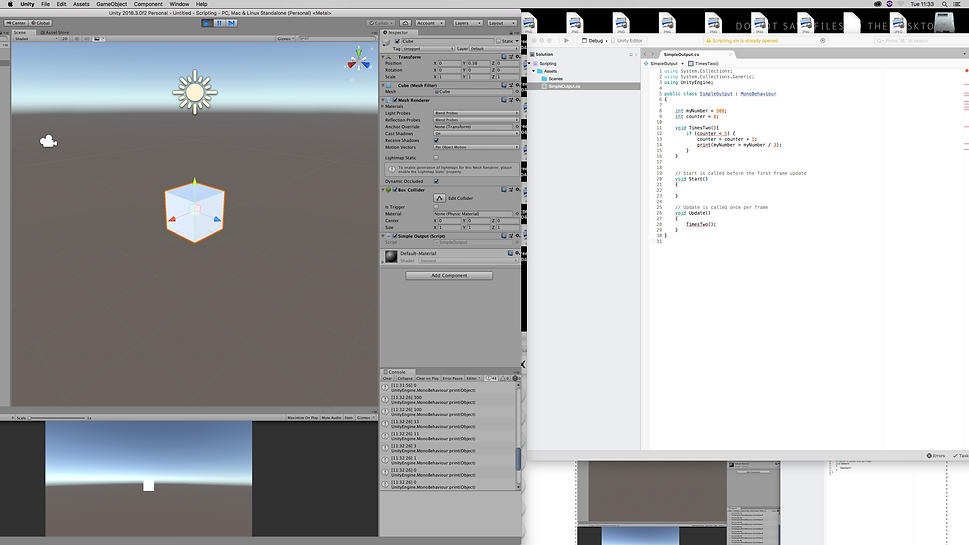
In this script it divided 900 by 5 times.
If statements

This if statement will change the message within the within the console depending on the number within the "int myS[peed = 15;" column.

This is an example. It shows the diffrent messages shown within the console.

This is an If statement that i made. It will display the message within the console of the type of age group that person is in depending on there age. for example, 0 -3 is shown as an Infant.

This an example of the result shown on the console.
Random Numbers / Colour

I placed a square into the scene, i also attached a script called random number

This is the result i got from my first script. i than change the numbers to colours and got this as an result.

This is the script which changes the colours randomly. I changes between three colours blue , red and green.

I grouped a bunch a cubes together which created this random colour square.
Movement

I placed a cube into a scene.


The script above ends up creating the text within the console once the space bar is pressed.

I created this script which changes the colour of the square once one of the right or left arrows where pressed.

This script allows the cube to move to the right and left.

This script is the finished script which allows the cube to move right and left.
Maze

I placed a file that i was already given and placed it into the scene. i placed the wall object into the scene.

I then duplicated the cubes and placed them in square with another space in the middle to move around in. I then placed the player prefab i was given within the folder into the scene.

I then placed a rigid body onto the player and applied the settings as seen above..

I then created a movement script and wrote as shown above. this allowed my player to move around in all direction.

My player can now move around and will not go through the wall because of the rigid body and i added a box collider onto the cubes.

I added the key prefab and added a circle collider to it

I also placed a rigidbody onto the key.

I created a script which i placed onto the key. it allows the player to pick up the key.

I changed the top part to player.

i edited the script which made the player the tag which means the key will only attach to the player and no other objects.

This script is placed onto the door and opens it. However, the door opens with the key and without the key.

I added to the movement script "KeyIsCollected".

I created a UI key script which means in the top corner of the screen a key symbol shows up and disappears once you pick up the key.

Final Result
Scripting Rotation

I added a blue car that I was given to the scene and created a script

The script allowed the car to rotate and move up and down.

I put a rigid body and a box collider onto the car this means that it will not move through the object.

I put a box collider onto the box this means it reacts with the car to stop the car from going through.

I put "Void FixedUpdate" onto the script this means it stops the car from glitching out in the wall. It dos this because FixedUpdate deals with the physicals of the object, by updating every frame which means every frame is the same.
Final Result
Lane Game

I used the Sprites that i was already given and created a main menu as seen as above.

I created this script which moves to another scene i created that is the main game screen.


In the other scene i created named "Game is created the scene that is shown above.

I created this script that is applied to the player and this script allows the player to jump between all the lanes.

I added in the enemy which i placed in the lane.

The script allows the enemy to move down along the lane.

I added a cube which was acting as a null.

I created this script to put on the cube. It controls the whole game and the rate at which all the enemies spawn.

The script makes the enemies spawn like this.

I added the try again object.

I added this script to the movement script to bring up the try again object once the game was over.

I attached the script to the try again object and once i clicked on it the game restarted

This script allows the user to go back to the main menu during the game.